Baking Some Lovely Millionaire’s Shortbread
December 13, 2022
Millionaire’s Shortbread is a traditional Scottish dessert made by topping Scottish shortbread with a layer of firm, chewy caramel and smooth milk chocolate. This dessert is delicious, pinky promise. Millionaire’s Shortbread is also known as the Caramel Slice in Australia and, commercially, as Twix here in the United States. The flavors of butteriness, toastiness, and decadence all marry together in this rich dessert.
Technically, this recipe is Billionaire’s Shortbread because while it is based on the traditional version, it has browned butter in the shortbread, dark chocolate not milk, and salted caramel as opposed to regular. It is more complex in terms of flavor, yet just as easy to make as the traditional dessert. I made these little tweaks to my recipe attempting to balance the flavors. All these individual elements of shortbread, caramel, and chocolate are delicious, but also quite sweet. So, I added extra salt and some slightly more bitter flavor, and I think that you are going to like the result.
So you don’t have to do an annoying amount of scrolling, I’m putting the recipe before all the directions. I’m going to walk you through the process of making this dessert with thorough explanations and pictures.
Recipe:
Shortbread:
- 1 cup unsalted butter, room temperature (227g)*
- 1 cup unsalted butter, lightly browned, room temperature (227g)
- 1 cup superfine sugar (227g)
- 4 ⅓ cups all-purpose flour (545g)
- 1 cup rice flour (136g)
- 1 teaspoon kosher salt (5g)
Baking Directions:
- After dough is formed, place and level in a 9×13 baking pan and chill in fridge until firm
- Score the dough (poke holes in the top with a fork) then chill again for about 30 minutes to an hour
- Bake at 325° for about 40-45 minutes or until light golden brown, with slightly darker edges
- Cool at room temperature for about 2 hours
Salted Caramel:
- ⅔ cup water (158g) (158mL)
- 2 cups granulated sugar (400g)
- ½ cup light corn syrup (163g) (118mL)
- 1 cup heavy cream (235g) (236mL)
- 6 tablespoons unsalted butter, room temperature (84g)
- 2 teaspoons vanilla extract (8g)
- 2 teaspoons kosher salt (10g)
Chocolate Topping:
- 8 ounces chopped dark chocolate, preferably 60% cacao
- Sprinkle of salt on top (optional)
*I have the measurements in both the standard American measuring system and in the metric system (grams).
Most people in the United States are used to the imperial system of measurement; however, in baking, the metric system is preferred because it is more accurate. I measured out my ingredients using measuring cups and spoons then checked the weight on a kitchen scale for both easier measurement and accuracy.
Materials:
- 1 pot/pan for browning butter
- 1 heat-resistant spoon/spatula
- 2 bowls for brown butter transferring and cooling
- 1 bowl for the shortbread
- 1 set of dry measuring cups
- 1 liquid measuring cup (optional)
- 1 set of measuring spoons
- 1 9×13 pan
- 1 fork
- 1 pot for the caramel
- 1 cutting board and knife for the chocolate
- 1 heat-resistant bowl for the chocolate
- 1 pot for boiling water
While this does look like a lot of supplies, you likely already have all these things in your house, and I even washed some things to use for the other elements.
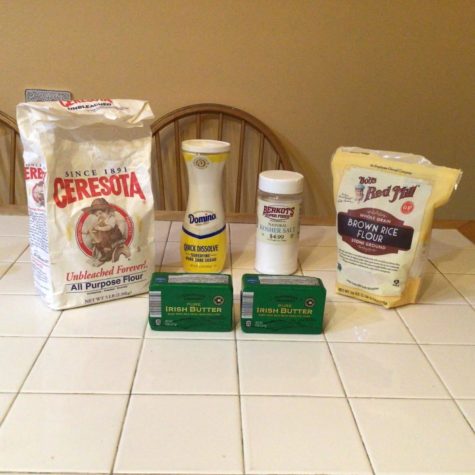
Let’s begin with prep. One thing to remember is that the process is cleaner and more enjoyable when you have everything measured out and ready in front of you. Here’s what you need for the shortbread layer:
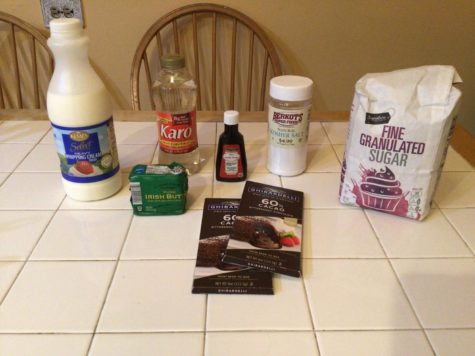
And here’s what you need for the caramel and chocolate layers:
With the shortbread layer, you can take as much time as you want and measure out as you go, but for the caramel layer, it is crucial that you have everything pre-measured before you begin. Otherwise, the caramel may end up burning while you are measuring.
Another important thing to remember is that all ingredients must be room temperature before you begin so that they can be incorporated into each other properly, or you will have a world of problems with the texture. The only exception to this rule is with the heavy cream for the caramel; it can still be cold when used.
Now the article is going to pause here, and the thorough directions will be continued in Part Two.
I highly recommend reading the directions once they are posted as they will have pictures for reference, explanations for why the elements are prepared as they are, and how they are prepared in full detail. Have fun baking!